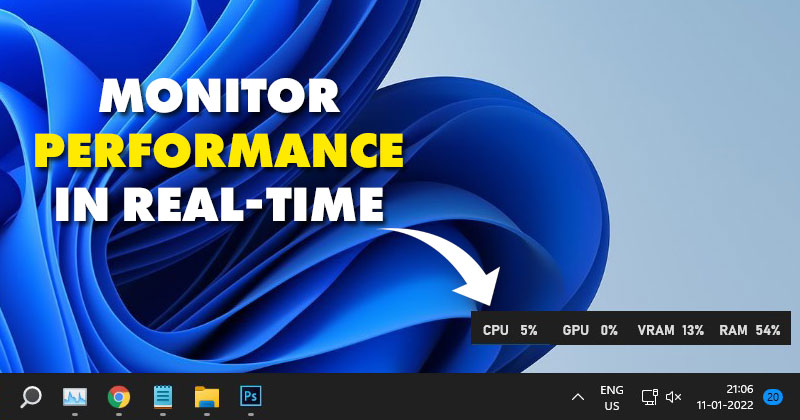
With the Task Manager, you can stop apps from running in the background, launch new apps in the background, and more. Also, you can explore the Performance section to view the real-time usage of CPU, GPU, HDD, SSD, and more. Even though Task Manager is helpful, you can’t pin it to your desktop, so you can’t monitor resource consumption in real-time. If you like to keep a close eye on the CPU, GPU, and RAM Consumption, you need to look for other system monitoring apps. Fortunately, Windows 11 includes a gaming feature known as ‘Xbox Game Bar’ that displays certain usage metrics. The best part about the Xbox Game Bar is that it displays an overlay showing the device’s CPU, GPU, and RAM usage in real-time. Also Read: How to Install Windows 11 on Unsupported PCs (Working Method)
Steps to Display CPU, GPU & RAM Usage Natively on Windows 11
You can pin the Xbox Game Bar’s performance widget to the desktop screen to make it visible all the time. Hence, in this article, we will show you a step-by-step guide on how to display CPU, GPU, and RAM usage natively on Windows 11. Let’s check out.
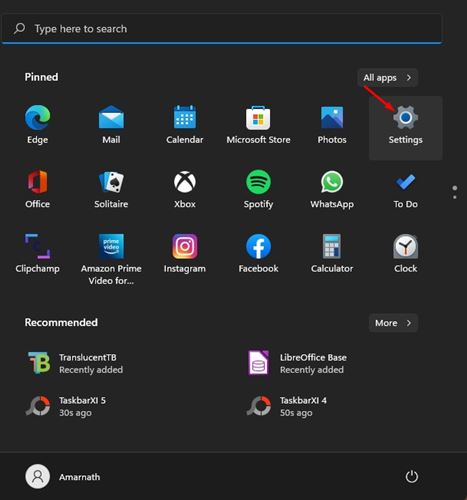
First of all, click on the Windows 11 start button and select Settings.
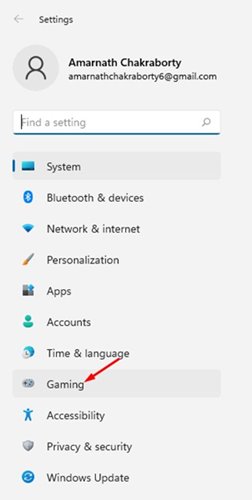
On the Settings app, click on the Gaming option as shown below.
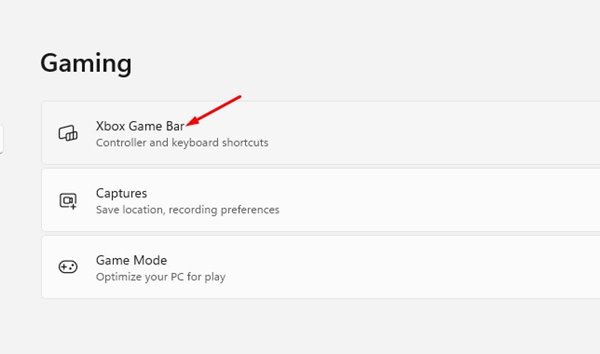
Click on the Xbox Game Bar option on the right pane.
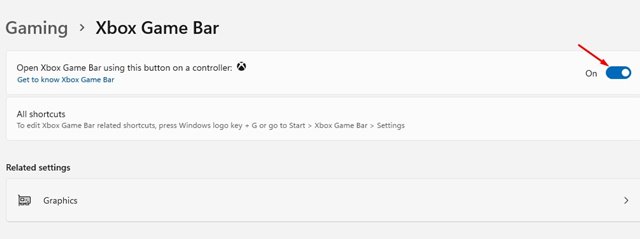
On the next screen, enable the toggle button for ‘Open Xbox Game Bar using this button’.
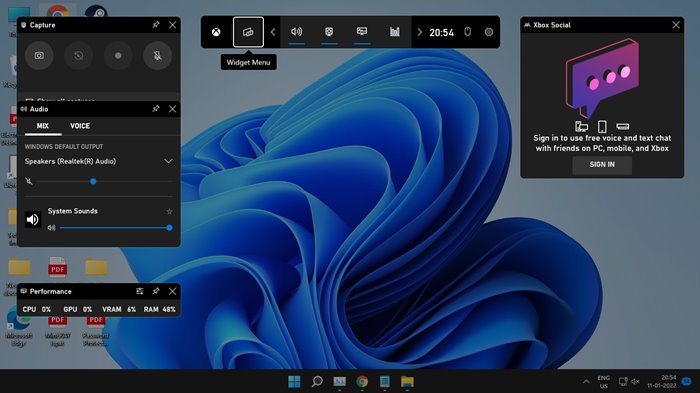
Now, move to the desktop screen and press the Windows Key + G button. This will open the Xbox game bar.
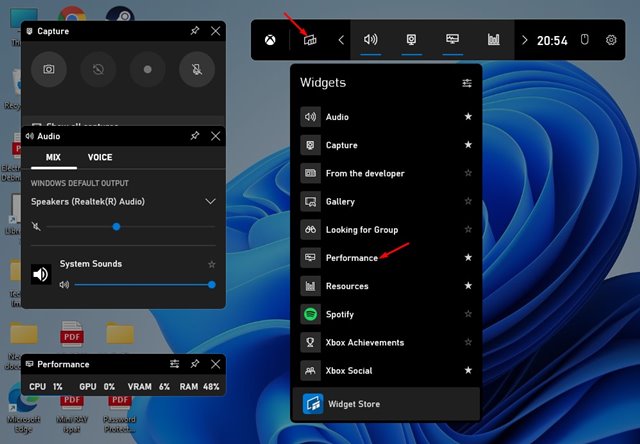
On the Xbox Game bar, click on the Widget option as shown below and click on the ‘Performance‘ widget.
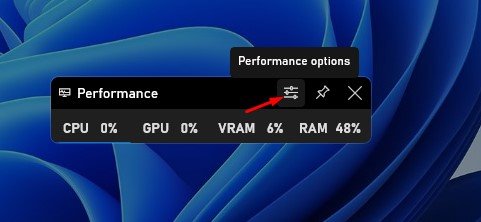
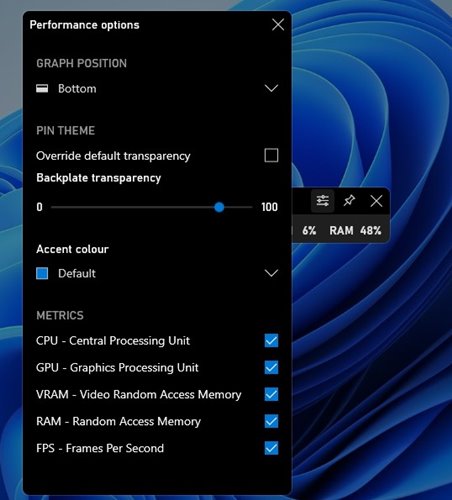
Now click on the Preference icon on the Performance Widget and select the graph position.
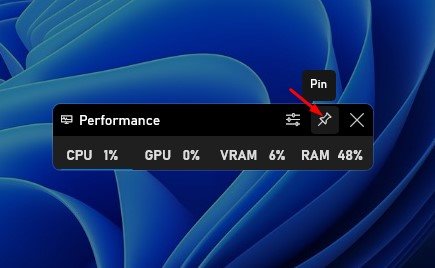
To make the widget visible all the time, click on the Pin icon on the Performance Widget.
That’s it! You are done. This is how you can display CPU, GPU, and RAM usage natively on Windows 11. Xbox Game bar is indeed a great utility of Windows 10/11. You can even use it to display the frame rates while playing games. I hope this article helped you! Please share it with your friends also. If you have any doubts related to this, let us know in the comment box below.
Δ